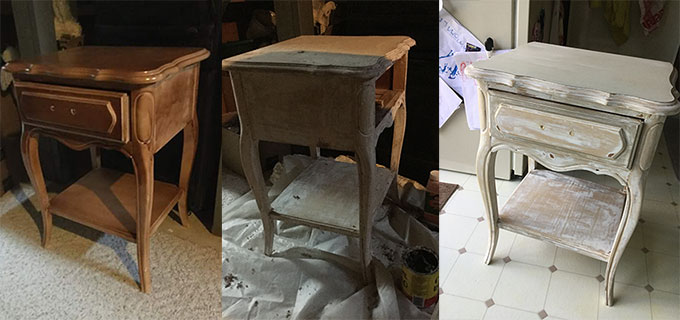
This one had a really sad, weird, spray on finish that was obviously a DIY fail.

Ew. So I thought the best (read: easiest and fastest) thing to do was take a little stripper to the drip spots, call it good and paint over everything.
Well, I used the stripper outside, and I quickly found that wasn't the best idea. For some reason the stripping solution immediately dried in the sun and was then worthless. What was supposed to be a quick fix turned into several hours of applying more stripper (this time in the basement), realizing it wasn't taking all of the finish off and proceeding to strip AND sand the entire rotten piece down.
It got pretty ugly.
 But after a couple of painful moments, she was ready to paint! It took several weeks for me to find the time and energy to paint, burnish and wax (my son is quite the handful these days) but I finally finished it last week.
And here is the after!


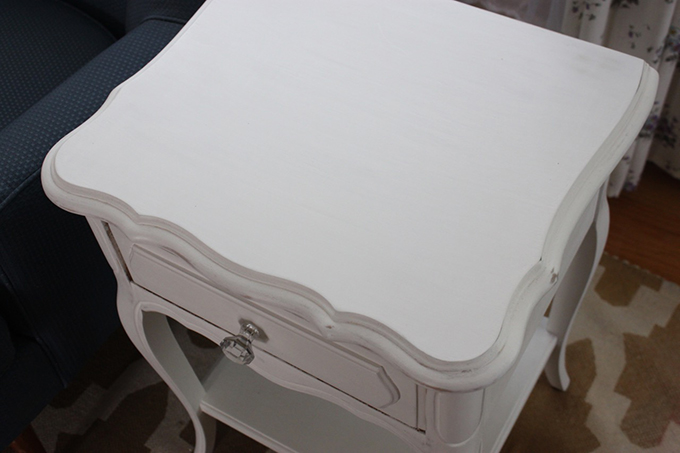


It's lightly distressed although I was attempting to not distress at all. In the burnishing (sanding) process, more of the paint came off than I wanted to because of all the edges to sand, so I just went with it because I was planning to sell the piece anyway. I used a furniture wax to seal it, painted the stained drawer bottom, and drilled a hole for the pretty new knob. Voila!
It sold tonight and now I have money to buy more paint to move on to my next furniture project: my handmade hope chest.
Absolutely love how you were able to save this piece! It took a lot of dedication, but you made it happen. Amazing to see it's transformation from sad to pretty :) Good luck with your hope chest!
ReplyDelete